Quick Start
Everything you need to start practicing with Loopster.
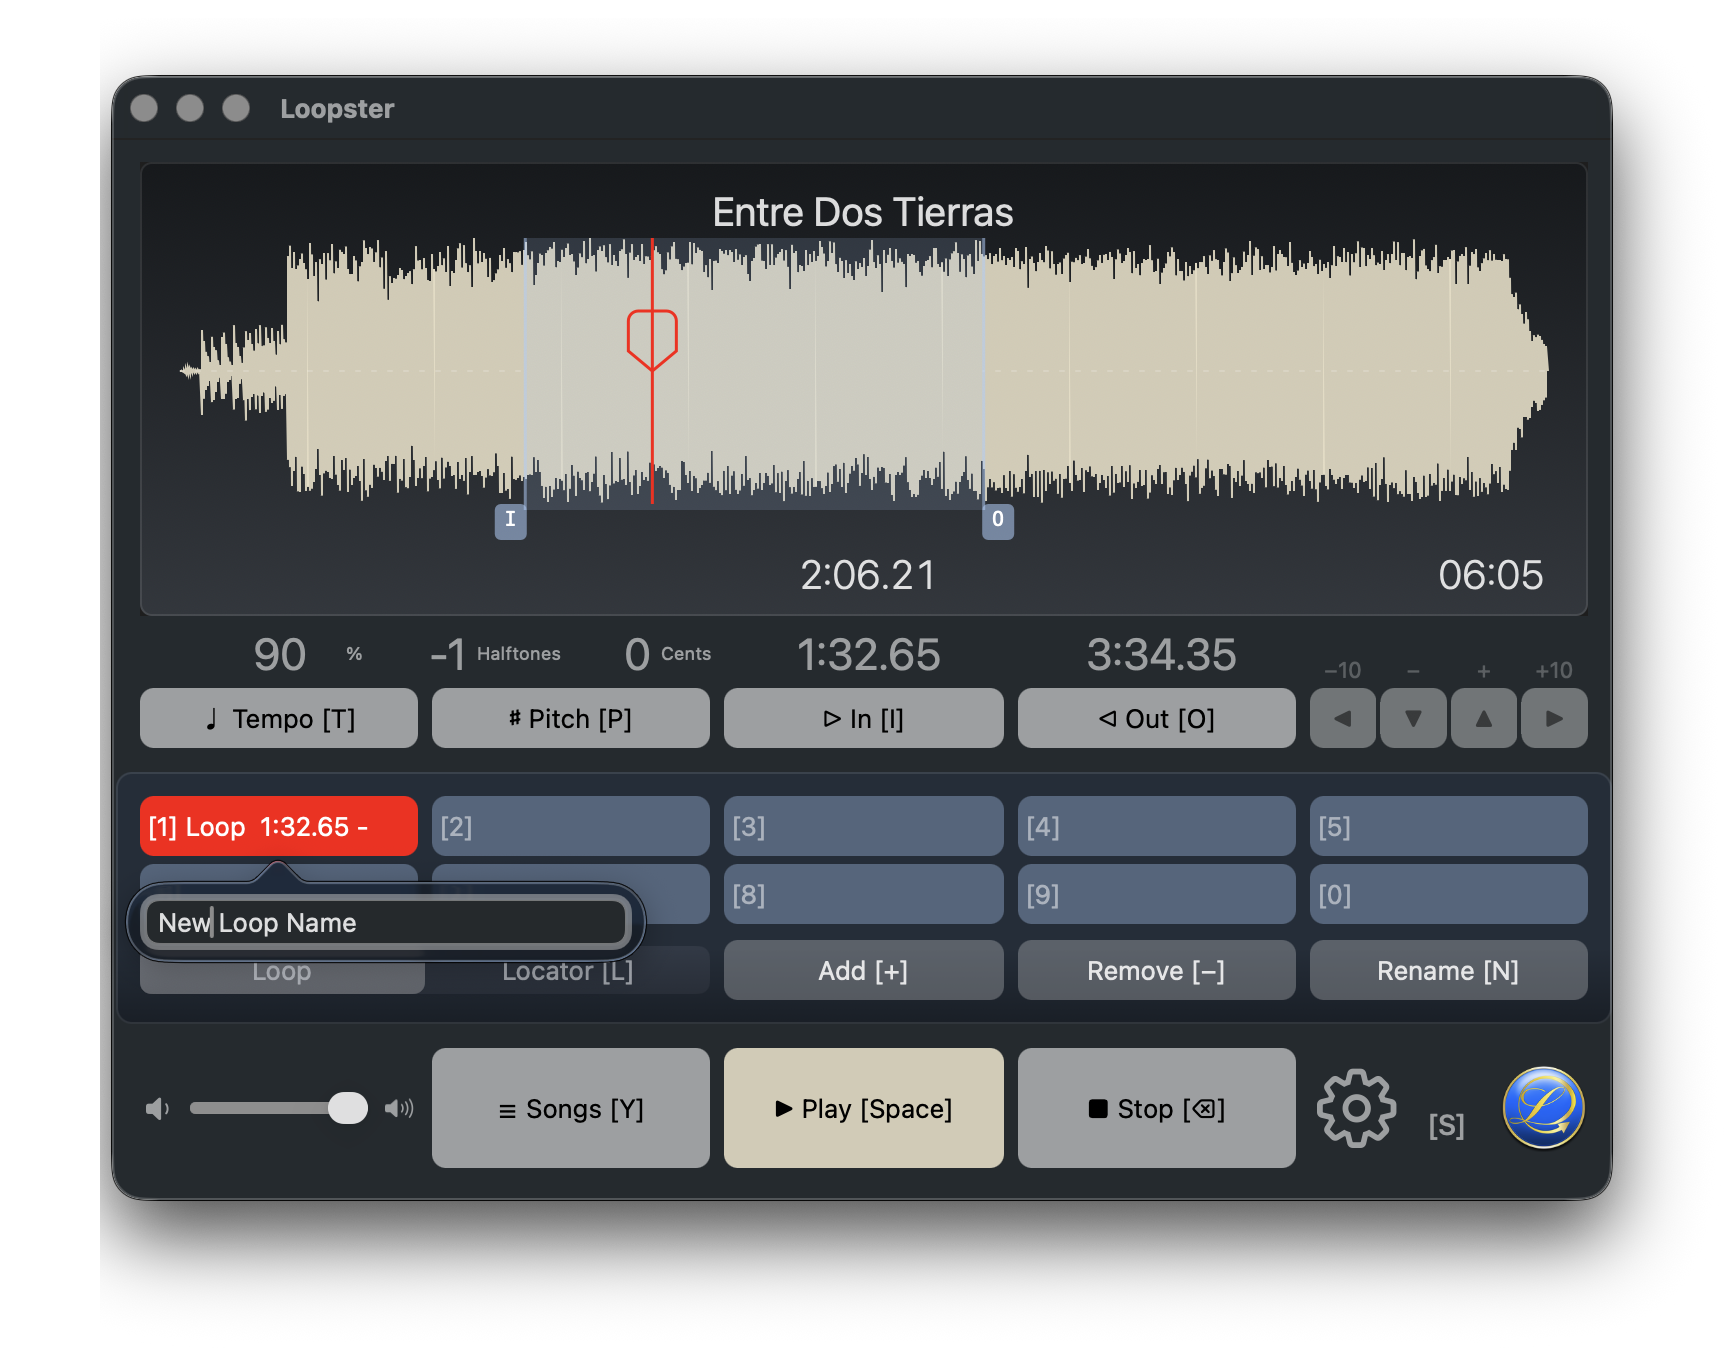
Loopster is built for the keyboard — every button shows the key that triggers it in square brackets. The fastest way to learn the app is to start pressing those keys.
The concept
Loopster has a front and a back side, like an LP or a CD. The front side is the playback area with tempo and pitch controls. The back side is where you create and edit playlists, add songs, and pick a song for playback. Press [Y] to flip between them.
Loopster saves tempo, pitch, locators, loops, and other per-song settings automatically. Quit, restart, pick the same song again — almost everything will be exactly as you left it.
Loopster is designed to behave more like a device than a typical app. Prefer the keyboard to get the most out of it. The mouse is fully supported too — you can scrub the waveform, click locators, and drag loop boundaries.
1. Load songs
Drag and drop one or more audio files from the Finder (or any source) onto the Loopster window to add them to the currently selected playlist.
Alternatively, flip to the back side with [Y], select the playlist you want, then press [Tab] to activate the song list. Press [+] (or the Add button) to open a file picker and add a song.
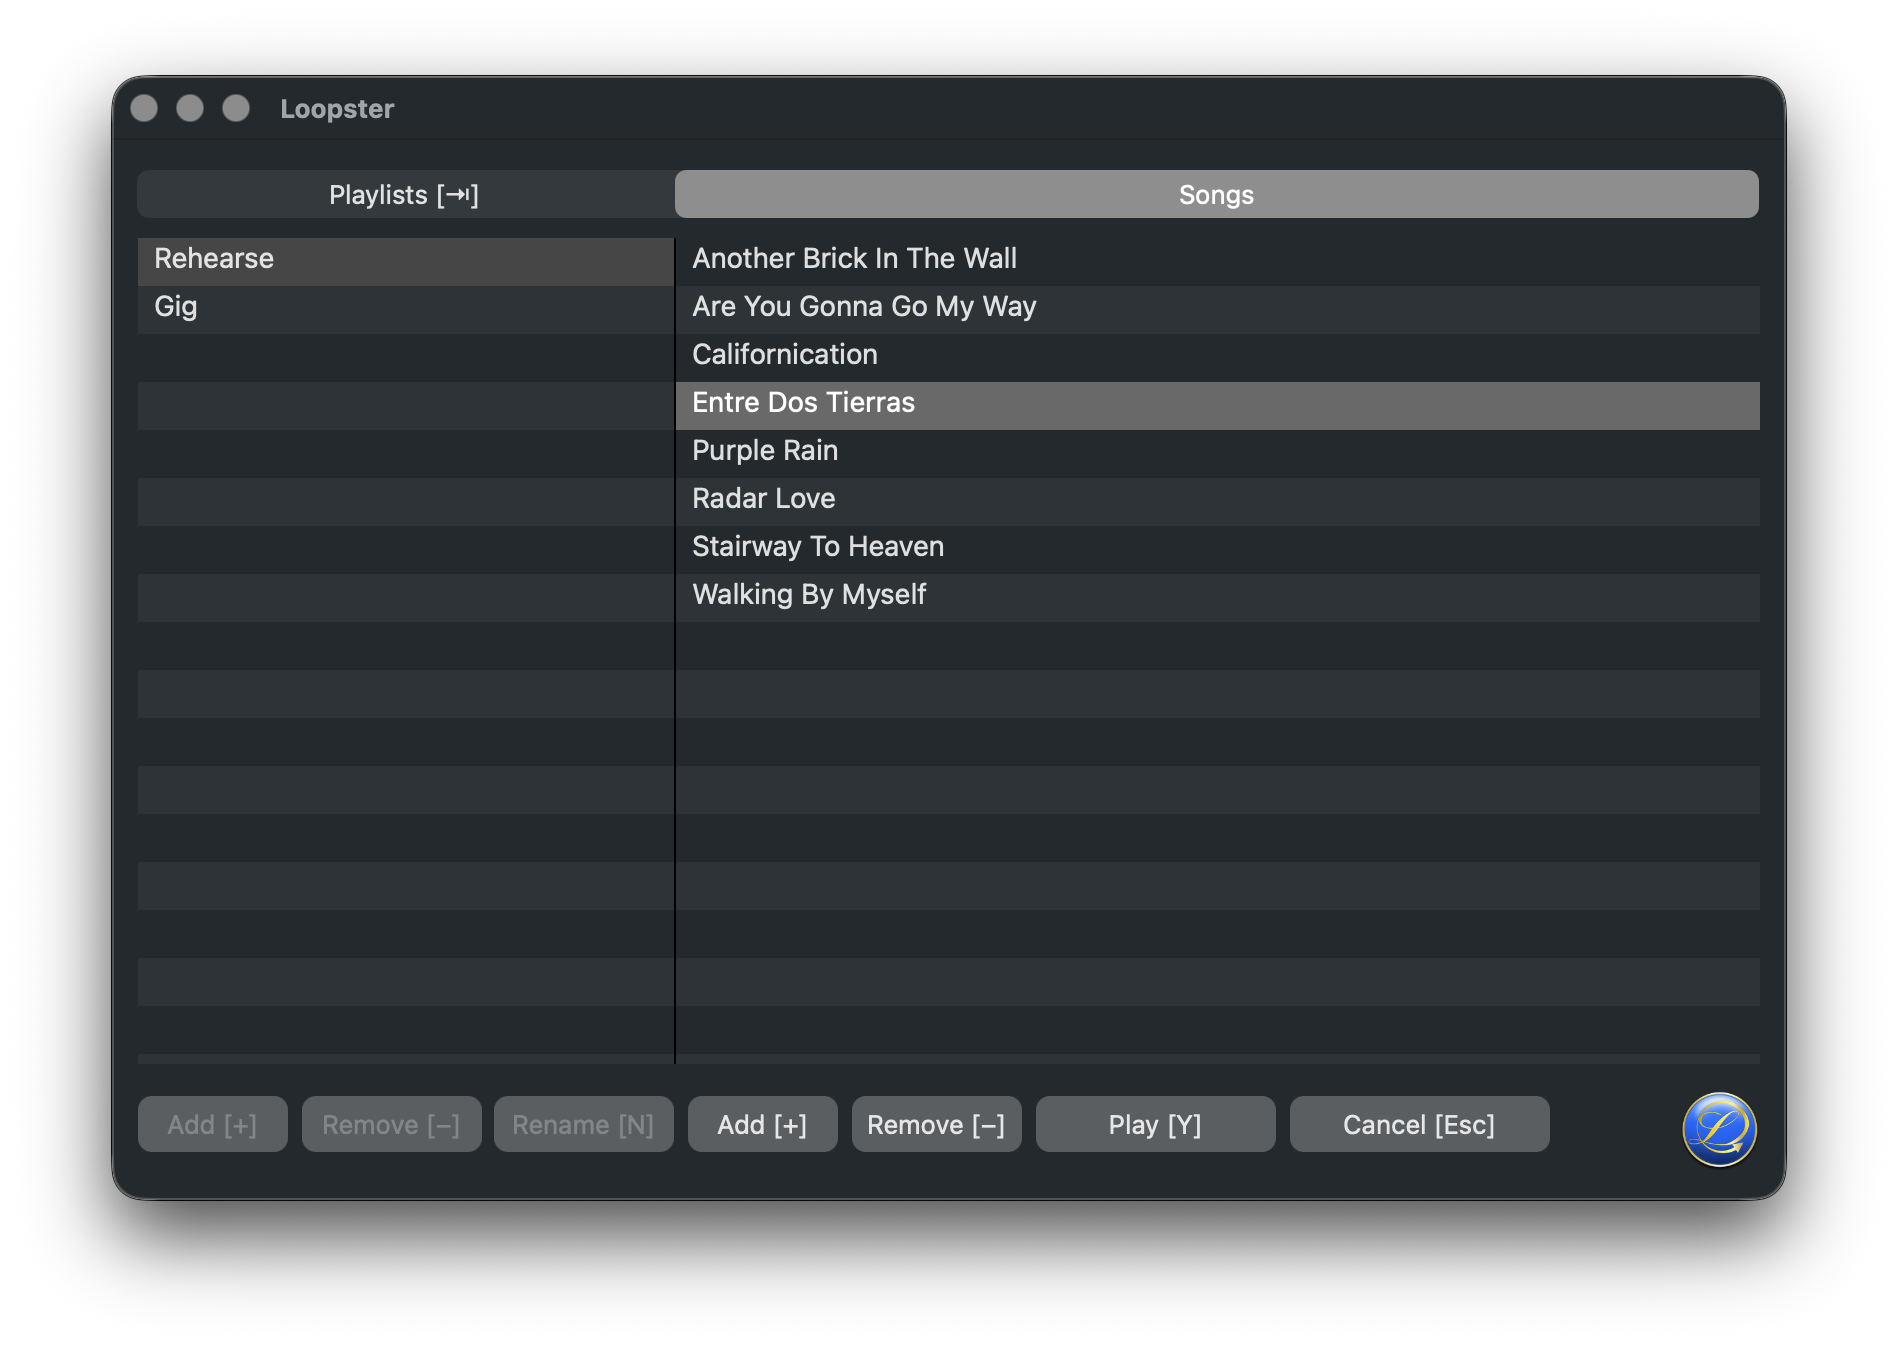
2. Pick a song [Y]
Press [Y] (or the Songs button) to flip to the back side. Pick a song from a playlist, then press [Y] again (or Play) to flip back to the front side and start playing it. You can also double-click a song on the back side to load it and flip back in one step.
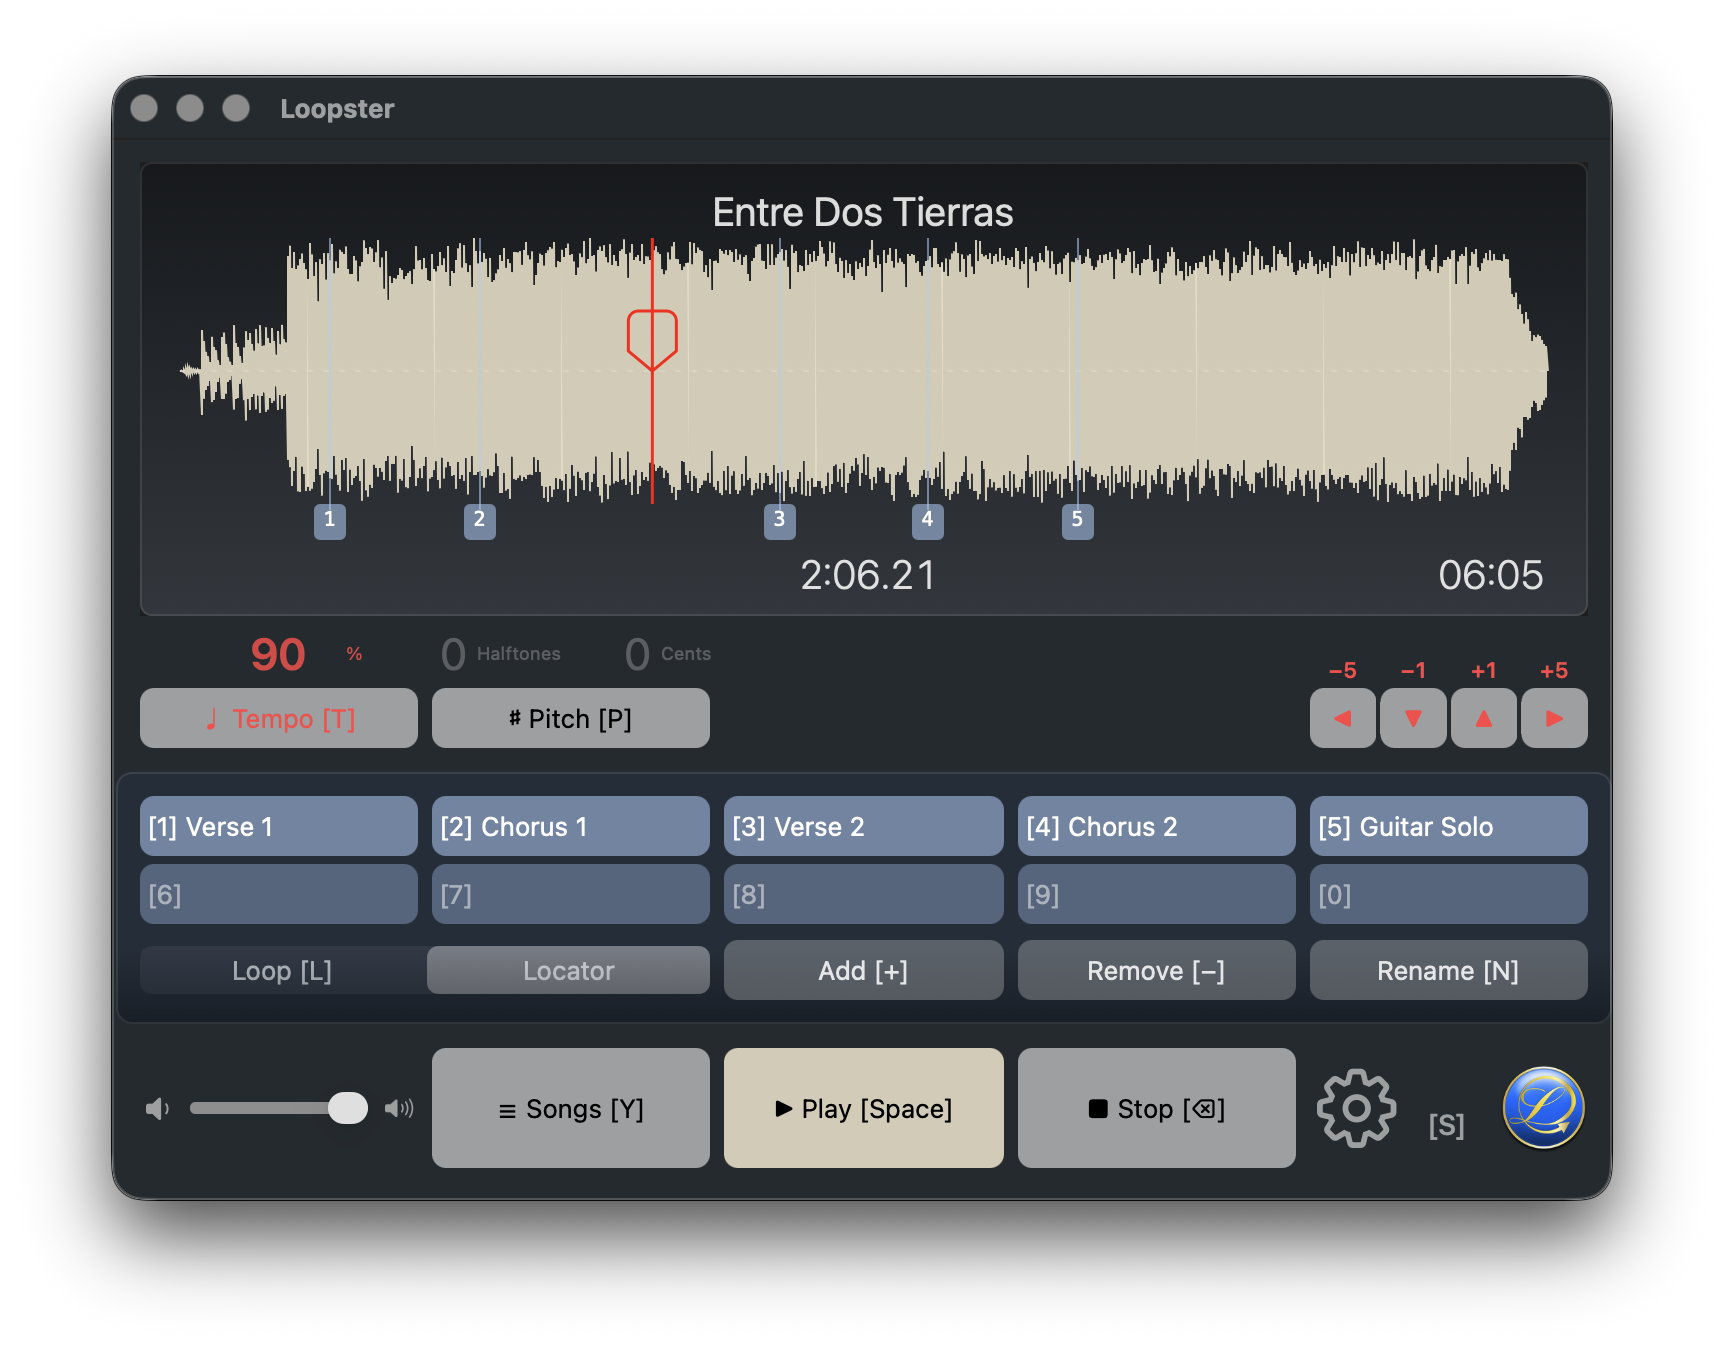
3. Playback [Space] · [⌫]
- Start / Pause / Continue: [Space] (or the Play / Pause button).
- Stop: [⌫] Backspace (or the Stop button).
5. Tempo [T]
Press [T] to arm tempo editing — the relevant labels turn red. Use the arrow keys to change playback speed. Press [T] again to leave tempo editing.
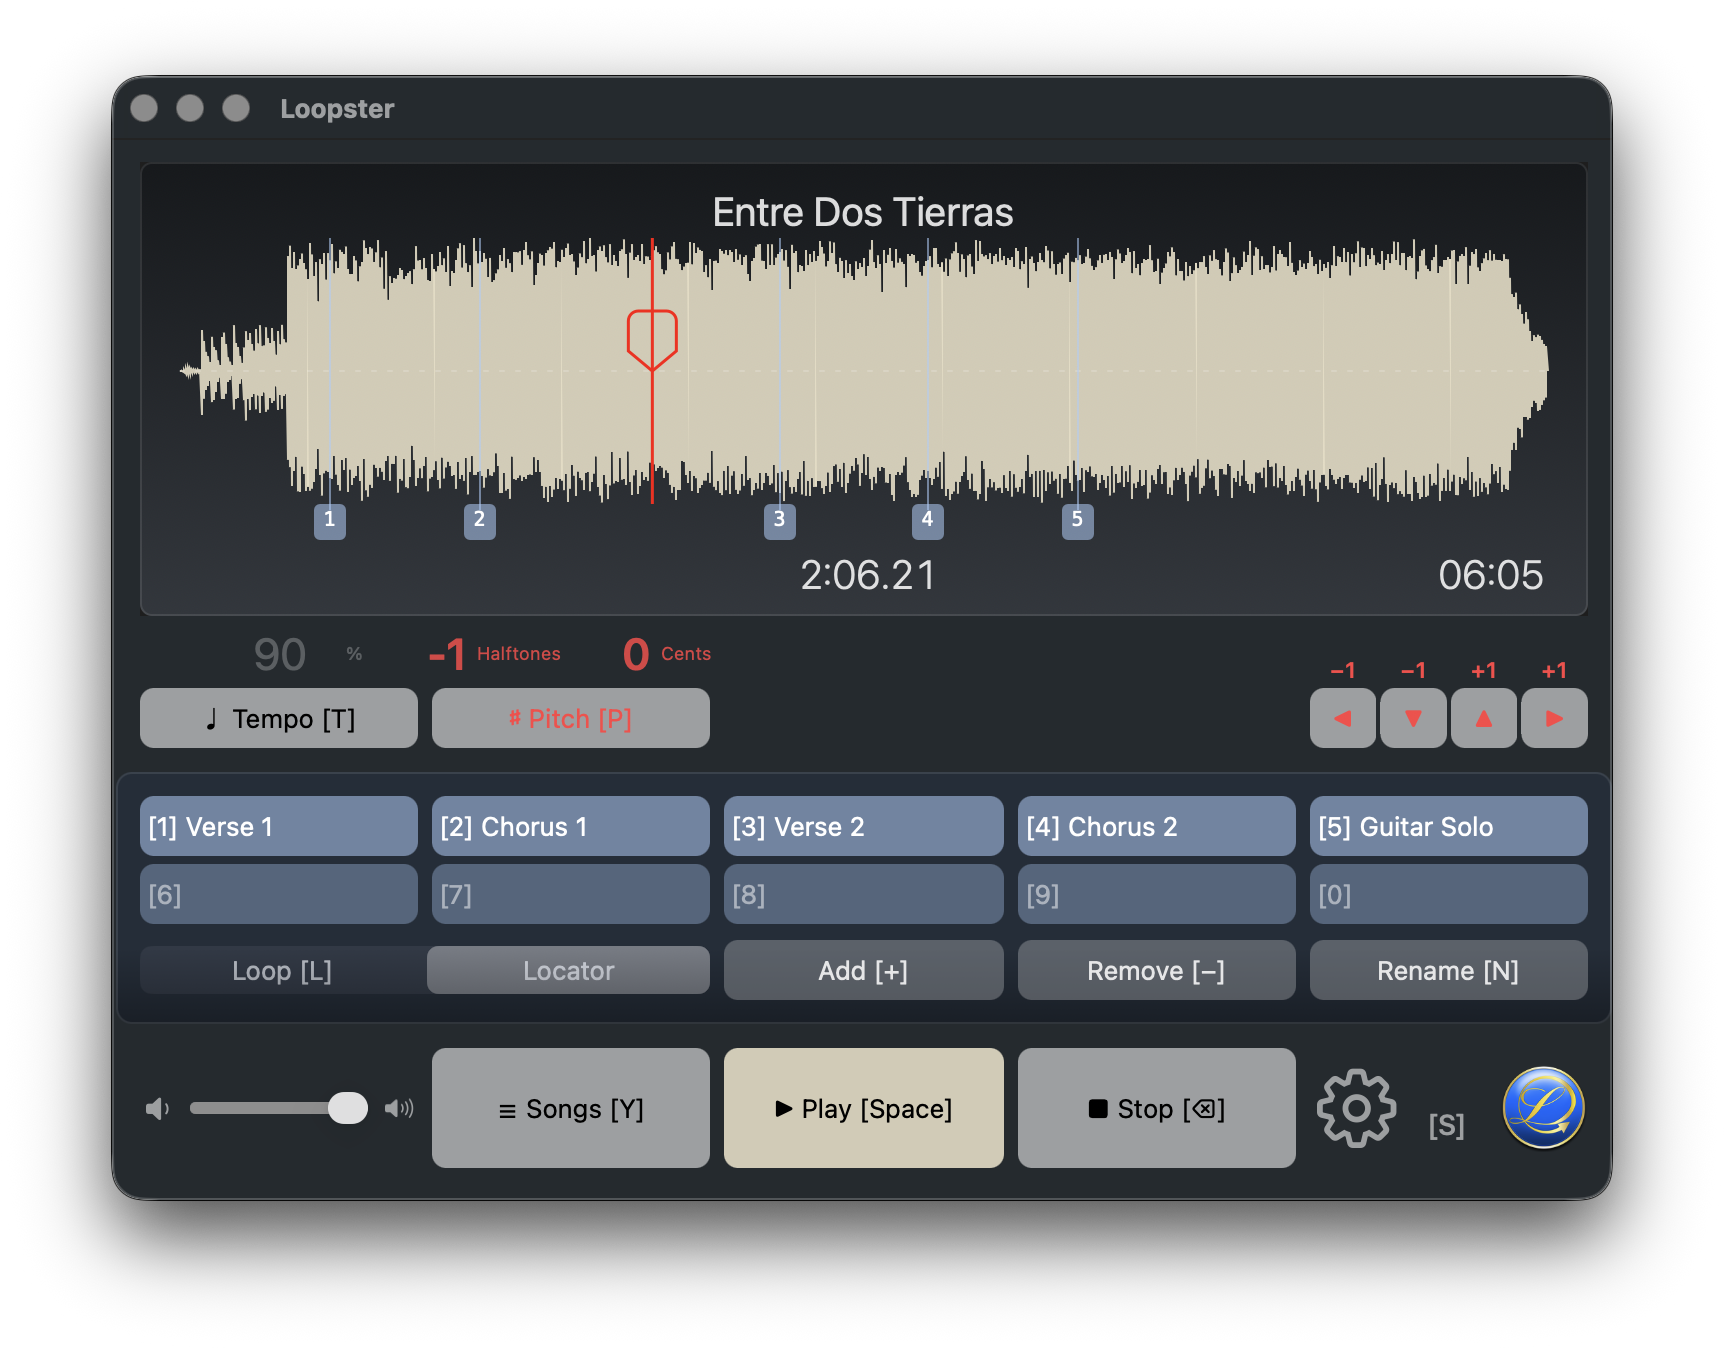
6. Pitch [P]
Press [P] to arm pitch editing.
- [←] / [→] — halftones down / up.
- [↓] / [↑] — cents (hundredths of a halftone) down / up.
Press [P] again to leave pitch editing.
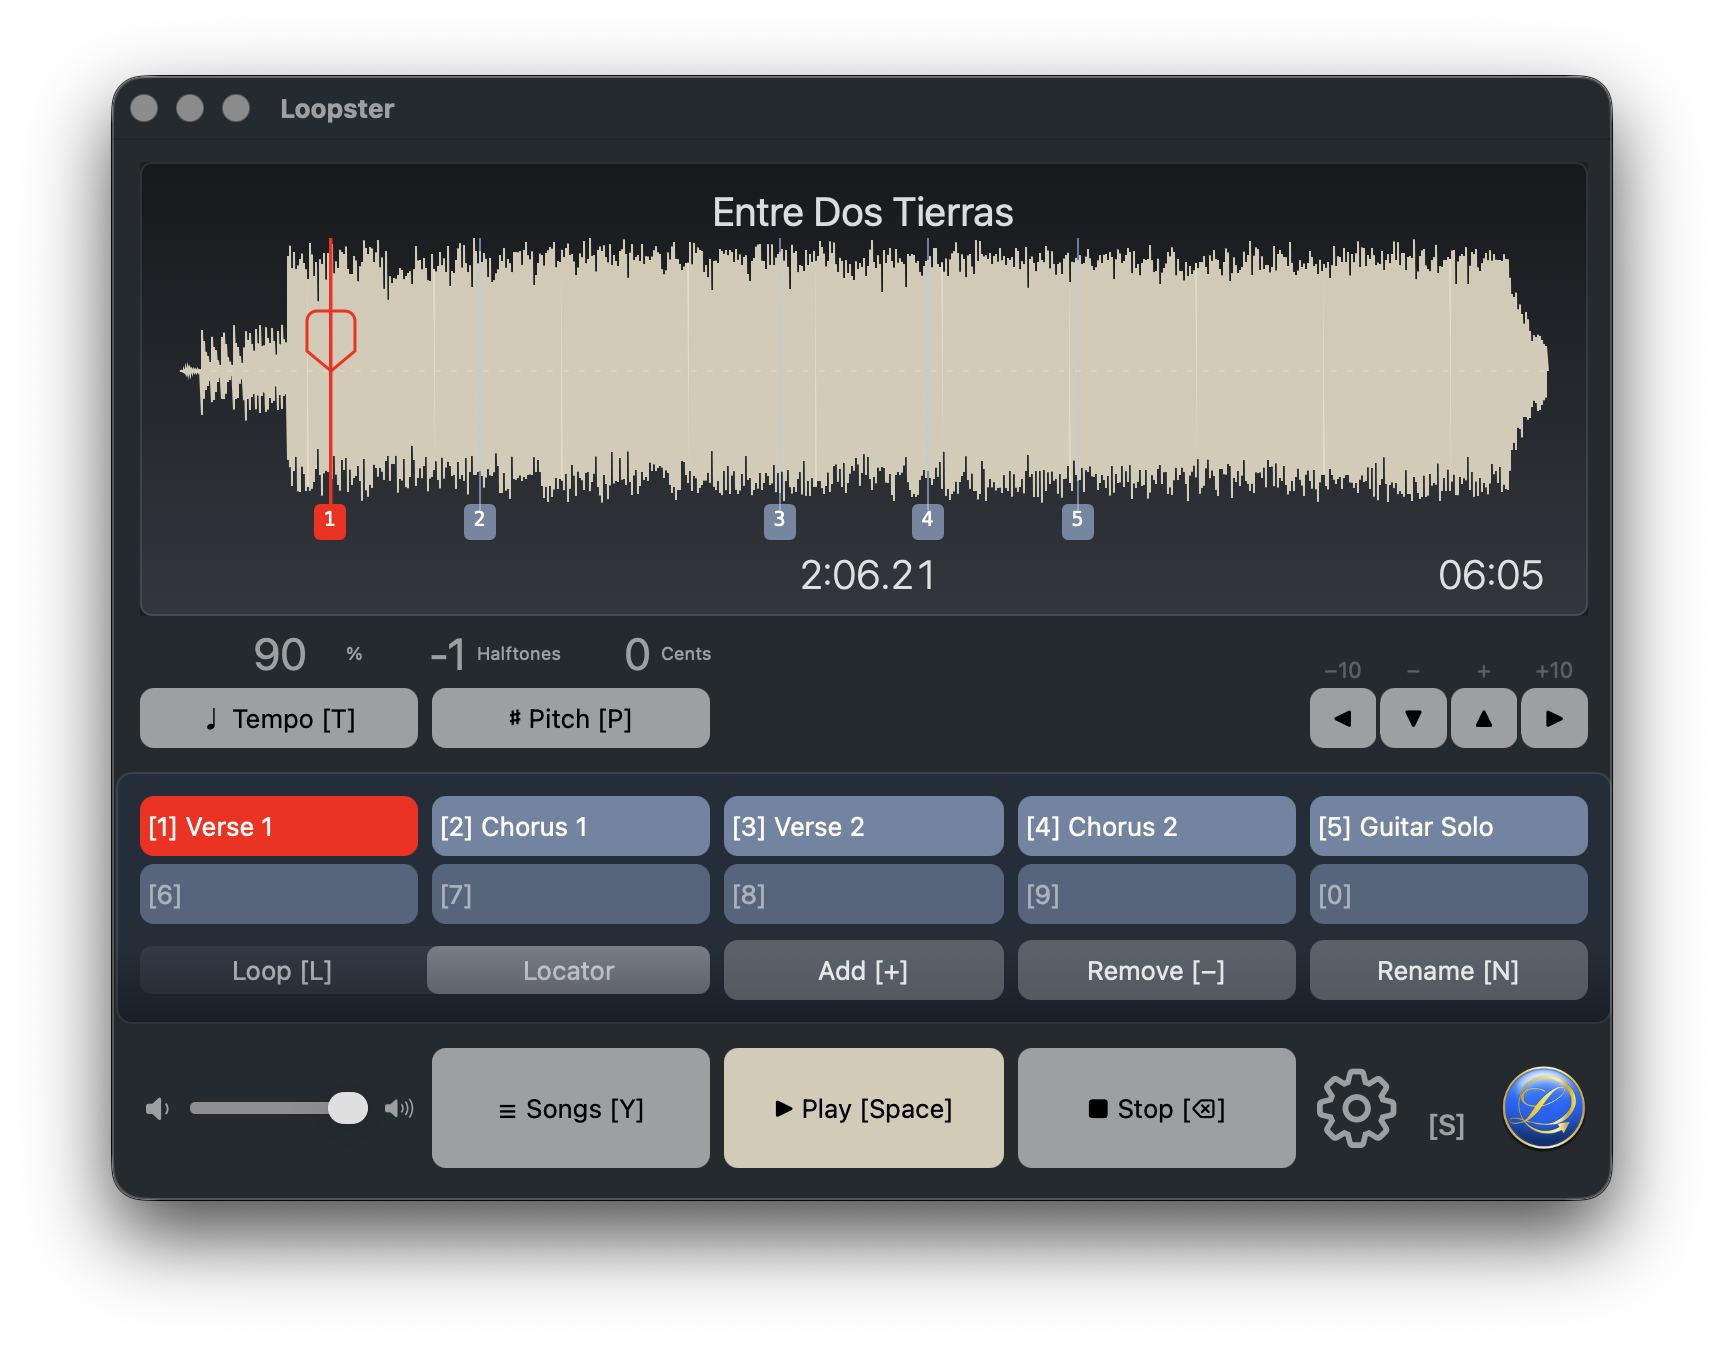
7. Locators
Locators are named bookmarks inside a song. Up to ten can be active at once, mapped to the keys [1]–[0].
- Create — press [+] to store a locator at the current playback position.
- Delete — press [−] to remove the active locator. Only the active locator can be deleted.
- Name — press [N] to rename the active locator. Locators stay sorted by song position.
- Select — press [1]…[0], or click a locator in the waveform.
- Move — drag a locator in the waveform with the mouse.
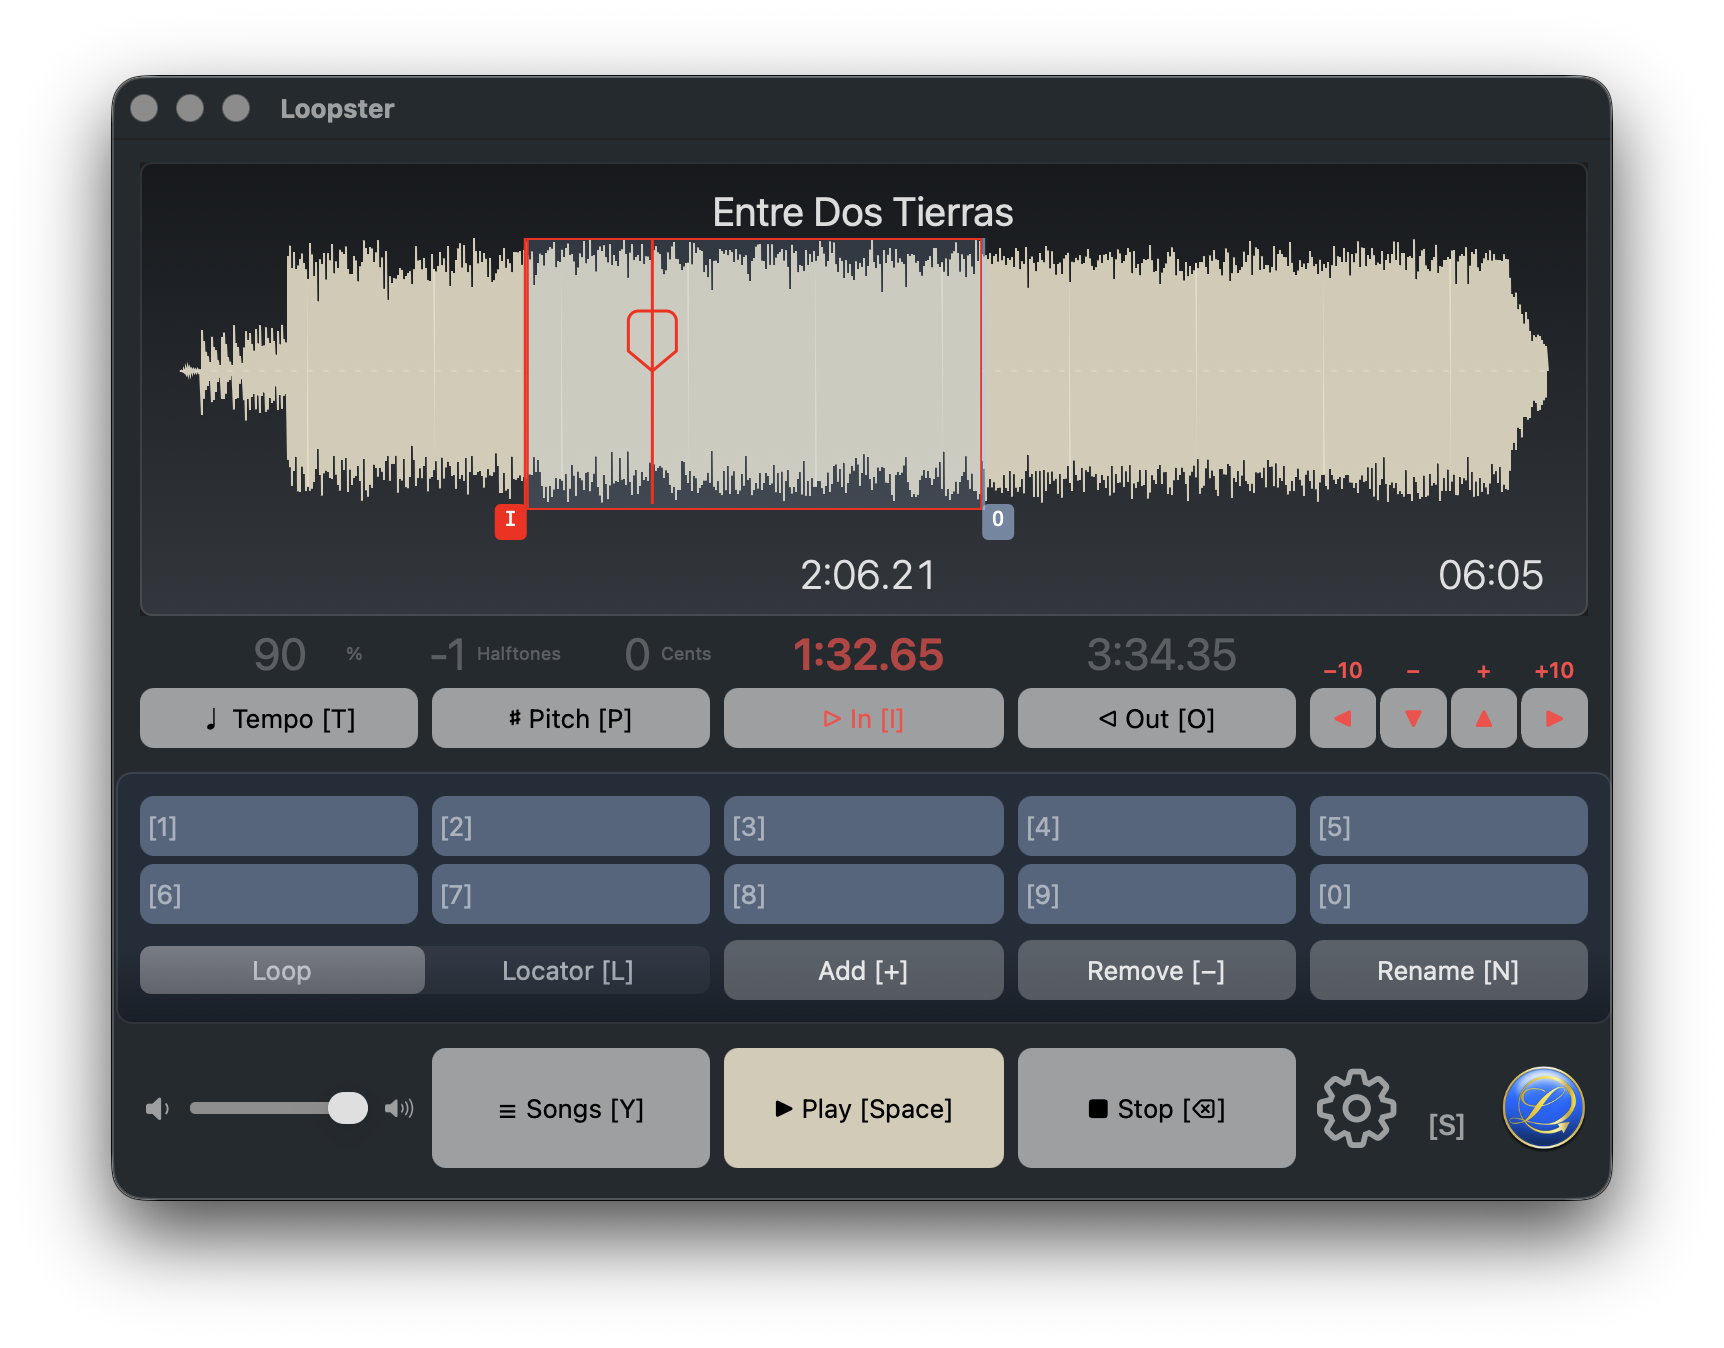
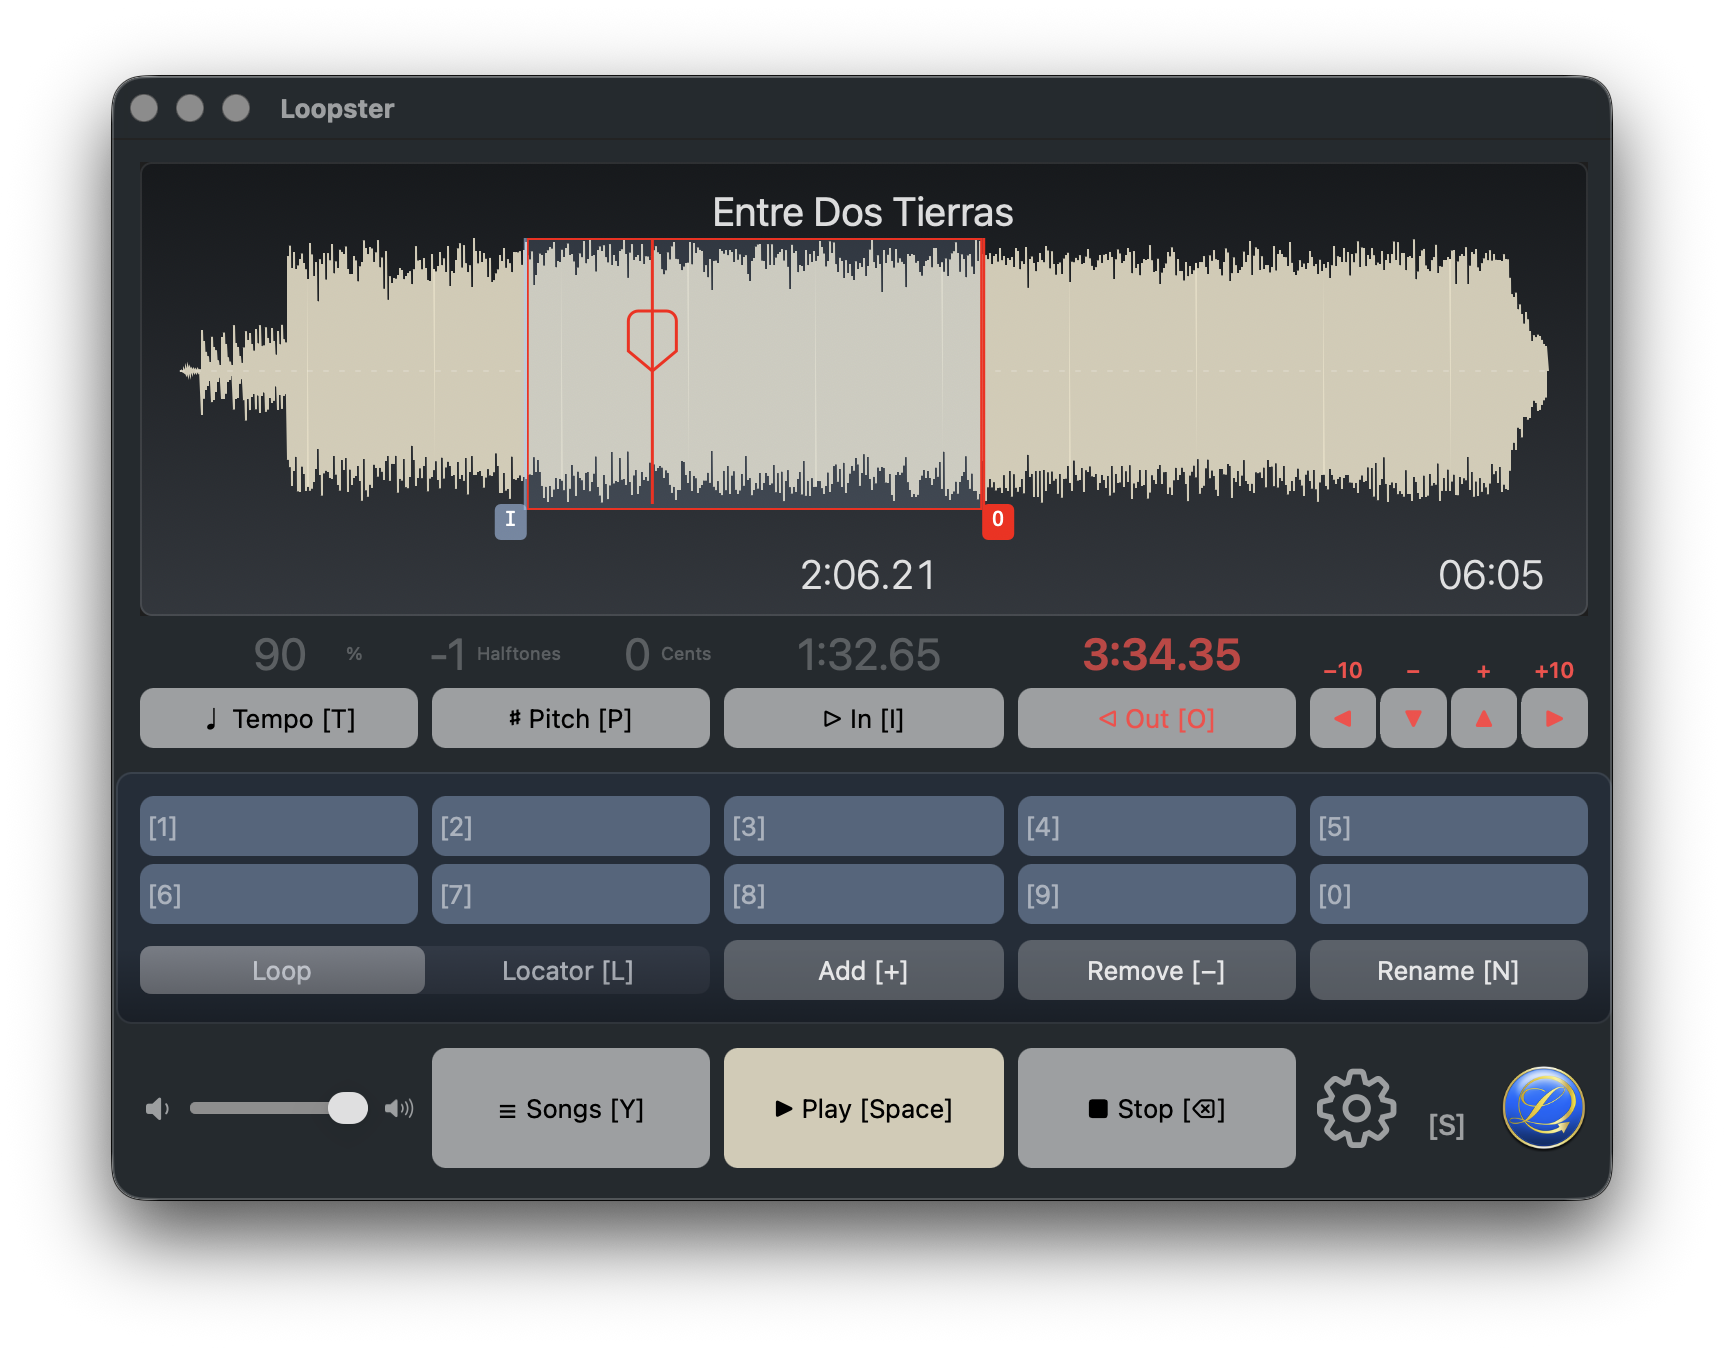
8. Loops [L]
Press [L] to toggle between locator mode and loop mode. The slot row swaps between locator timestamps and loop names.
- Loop start — press [I] and move with the arrow keys (or drag with the mouse).
- Loop end — press [O] and move with the arrow keys (or drag).
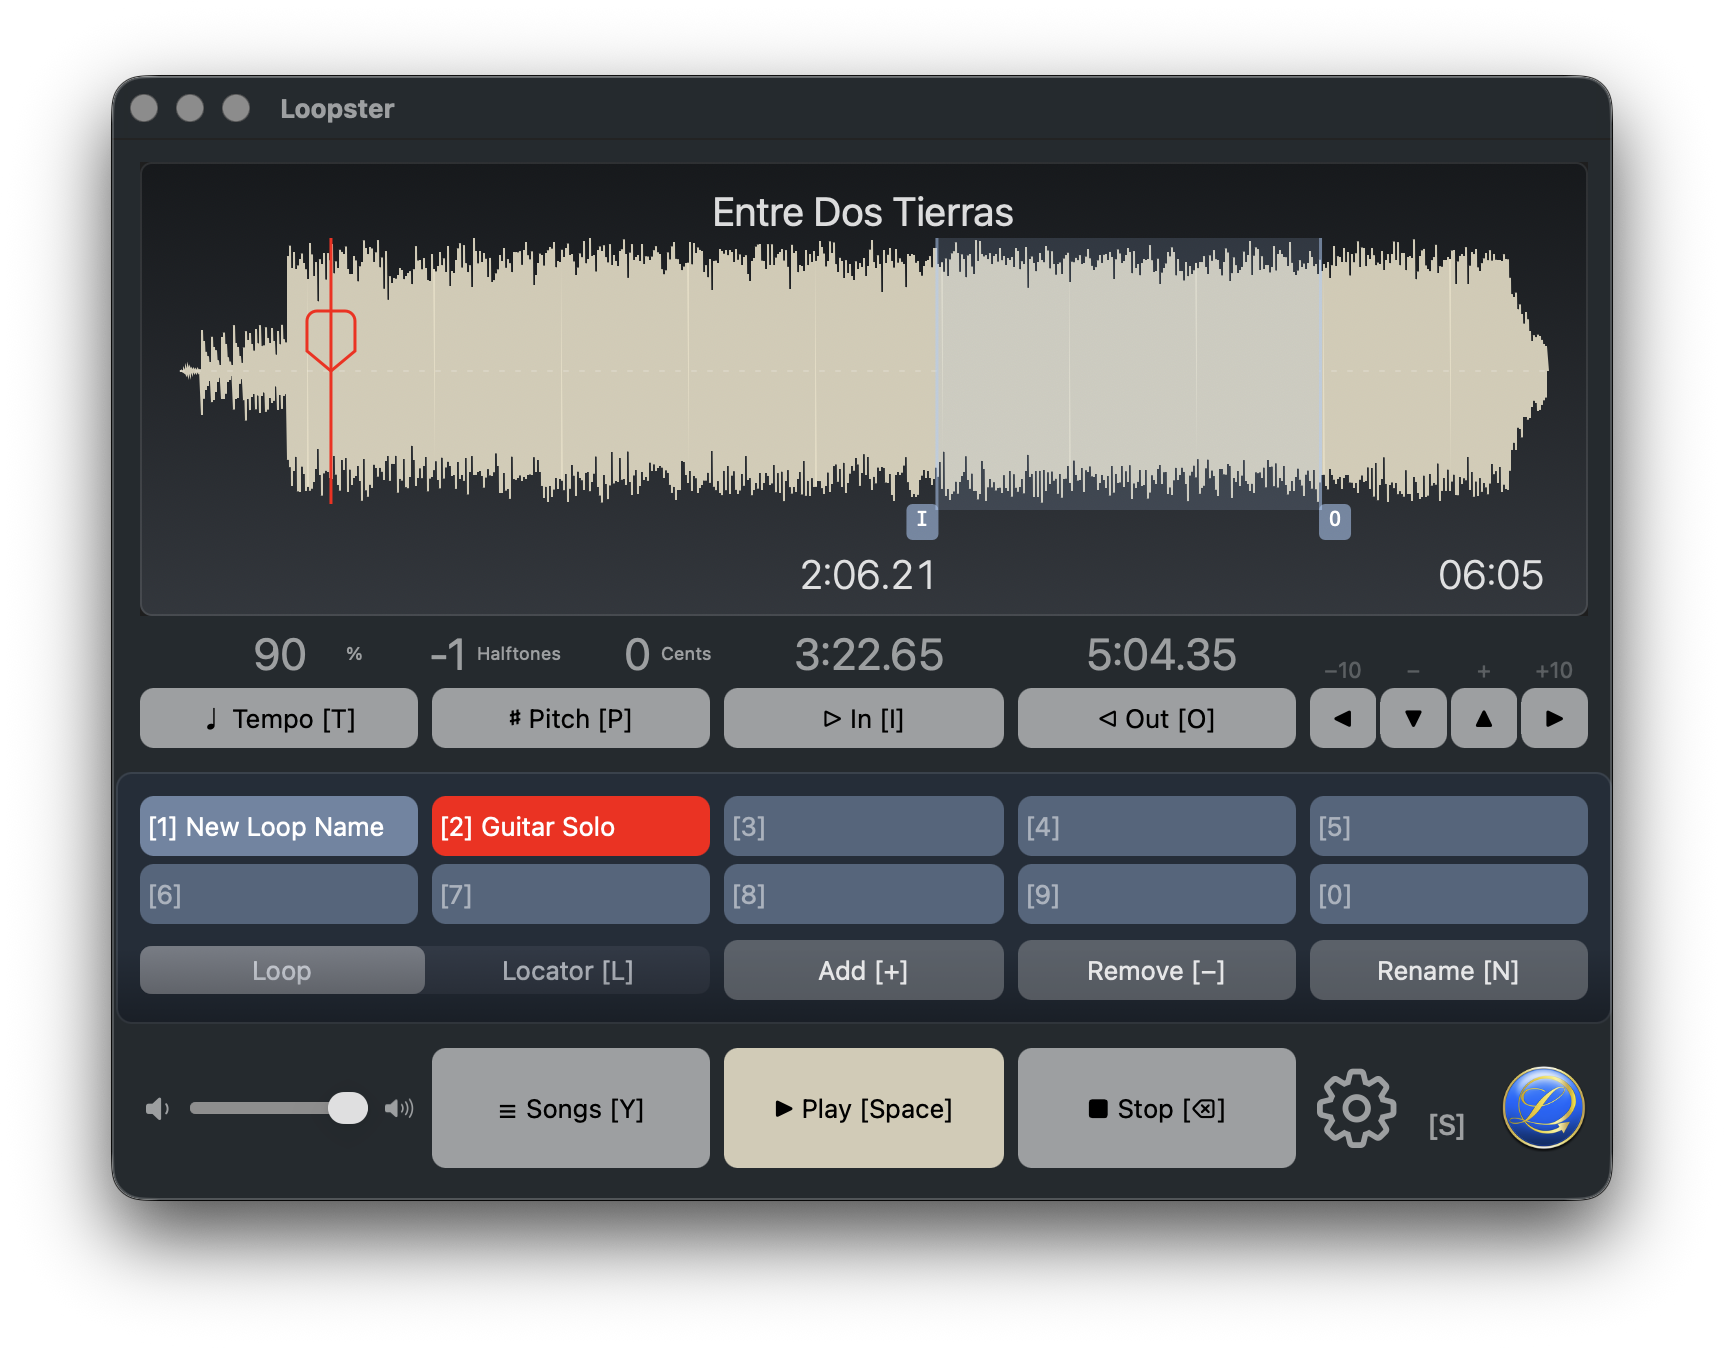
- Create — press [+] to store the current loop.
- Delete — press [−] to remove the active loop.
- Name — press [N]. Loops stay sorted by start position.
- Select — press [1]…[0]. Only the active loop can be deleted.
9. Export [⌘E]
Once you've changed tempo or pitch the way you want, save a rendered file: File → Export, or press [⌘E].
The file is saved to:
/Users/<your user name>/Music/Loopster/<automatically generated filename>.<ext>
The audio format (MP3, AAC, or WAV) is chosen in Preferences → Output → Export Format.
10. Preferences [⌘,]
Open the Preferences window from the menu, press [⌘,] or [S], or click the Settings icon in the front window's bottom-right corner.
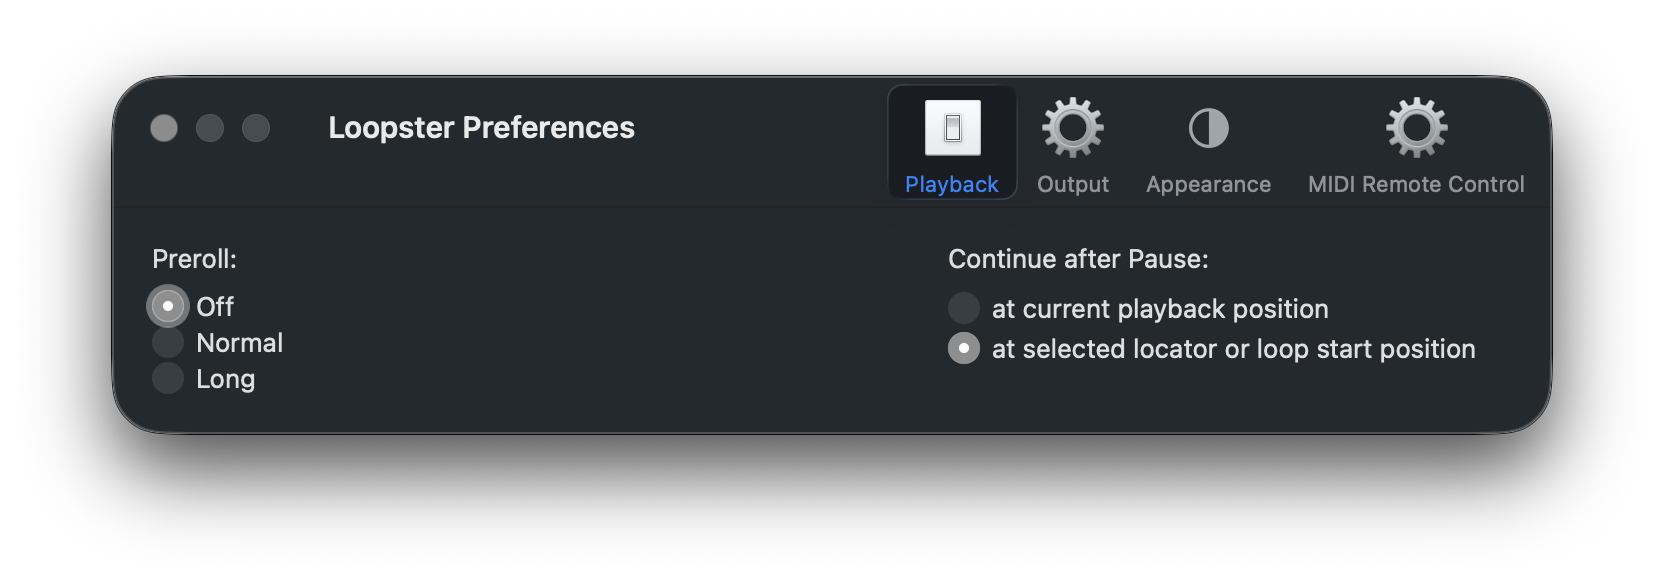
Playback
- Preroll — change or switch off the short pause before playback.
- Continue after Pause — resume from where you paused, or from the last selected locator or loop start. The second choice is handy when you're practicing the same passage over and over.
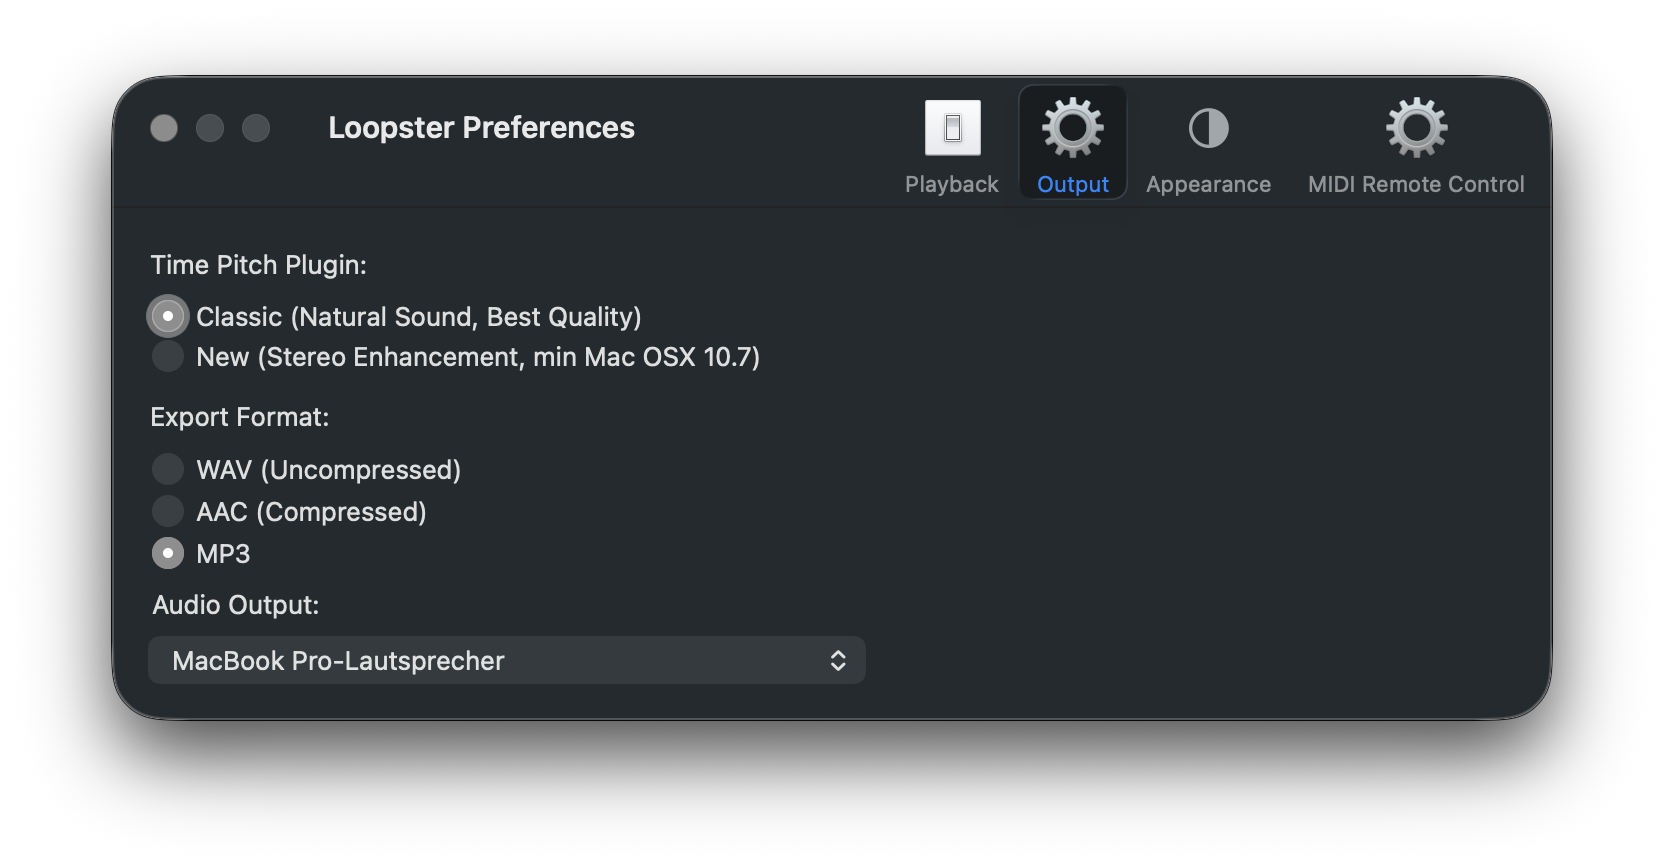
Output
- Time-Pitch Plugin — Classic gives the most natural sound and best quality. New adds a stereo enhancement and may affect playback volume slightly.
- Export Format — WAV is uncompressed and largest, AAC and MP3 are compressed; for most material the quality loss is inaudible.
- Audio Output — choose your preferred output device. AirPlay receivers (Apple TV and similar) are supported; note that network playback can introduce delay, especially when looping.
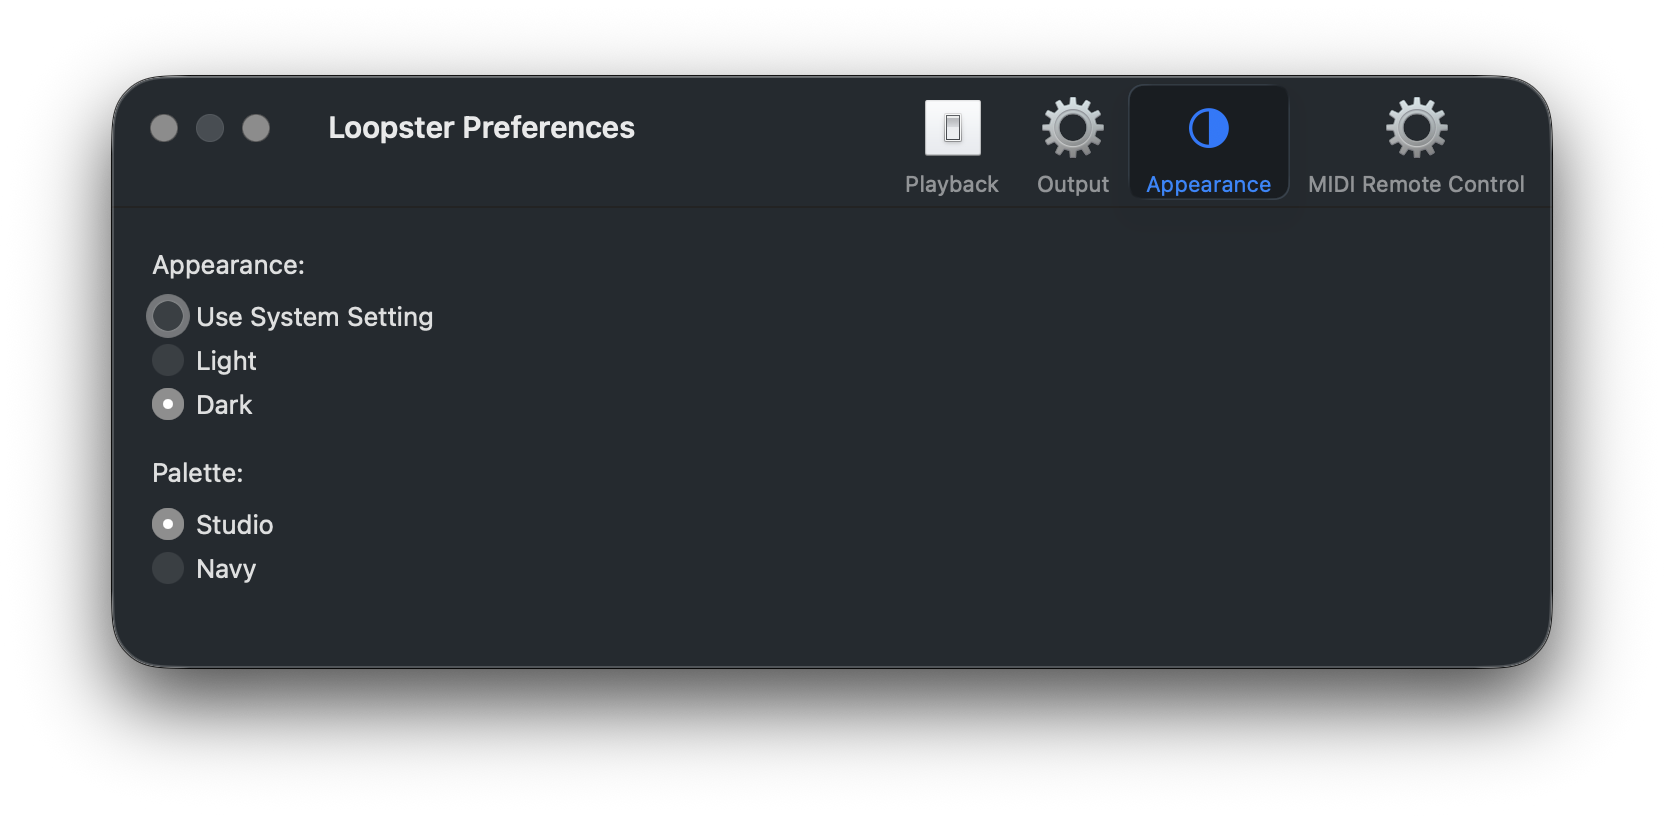
Appearance New
- Appearance — follow the System setting, or force Light or Dark.
- Palette — Studio (the default warm neutral waveform) or Navy (a cooler blue palette).
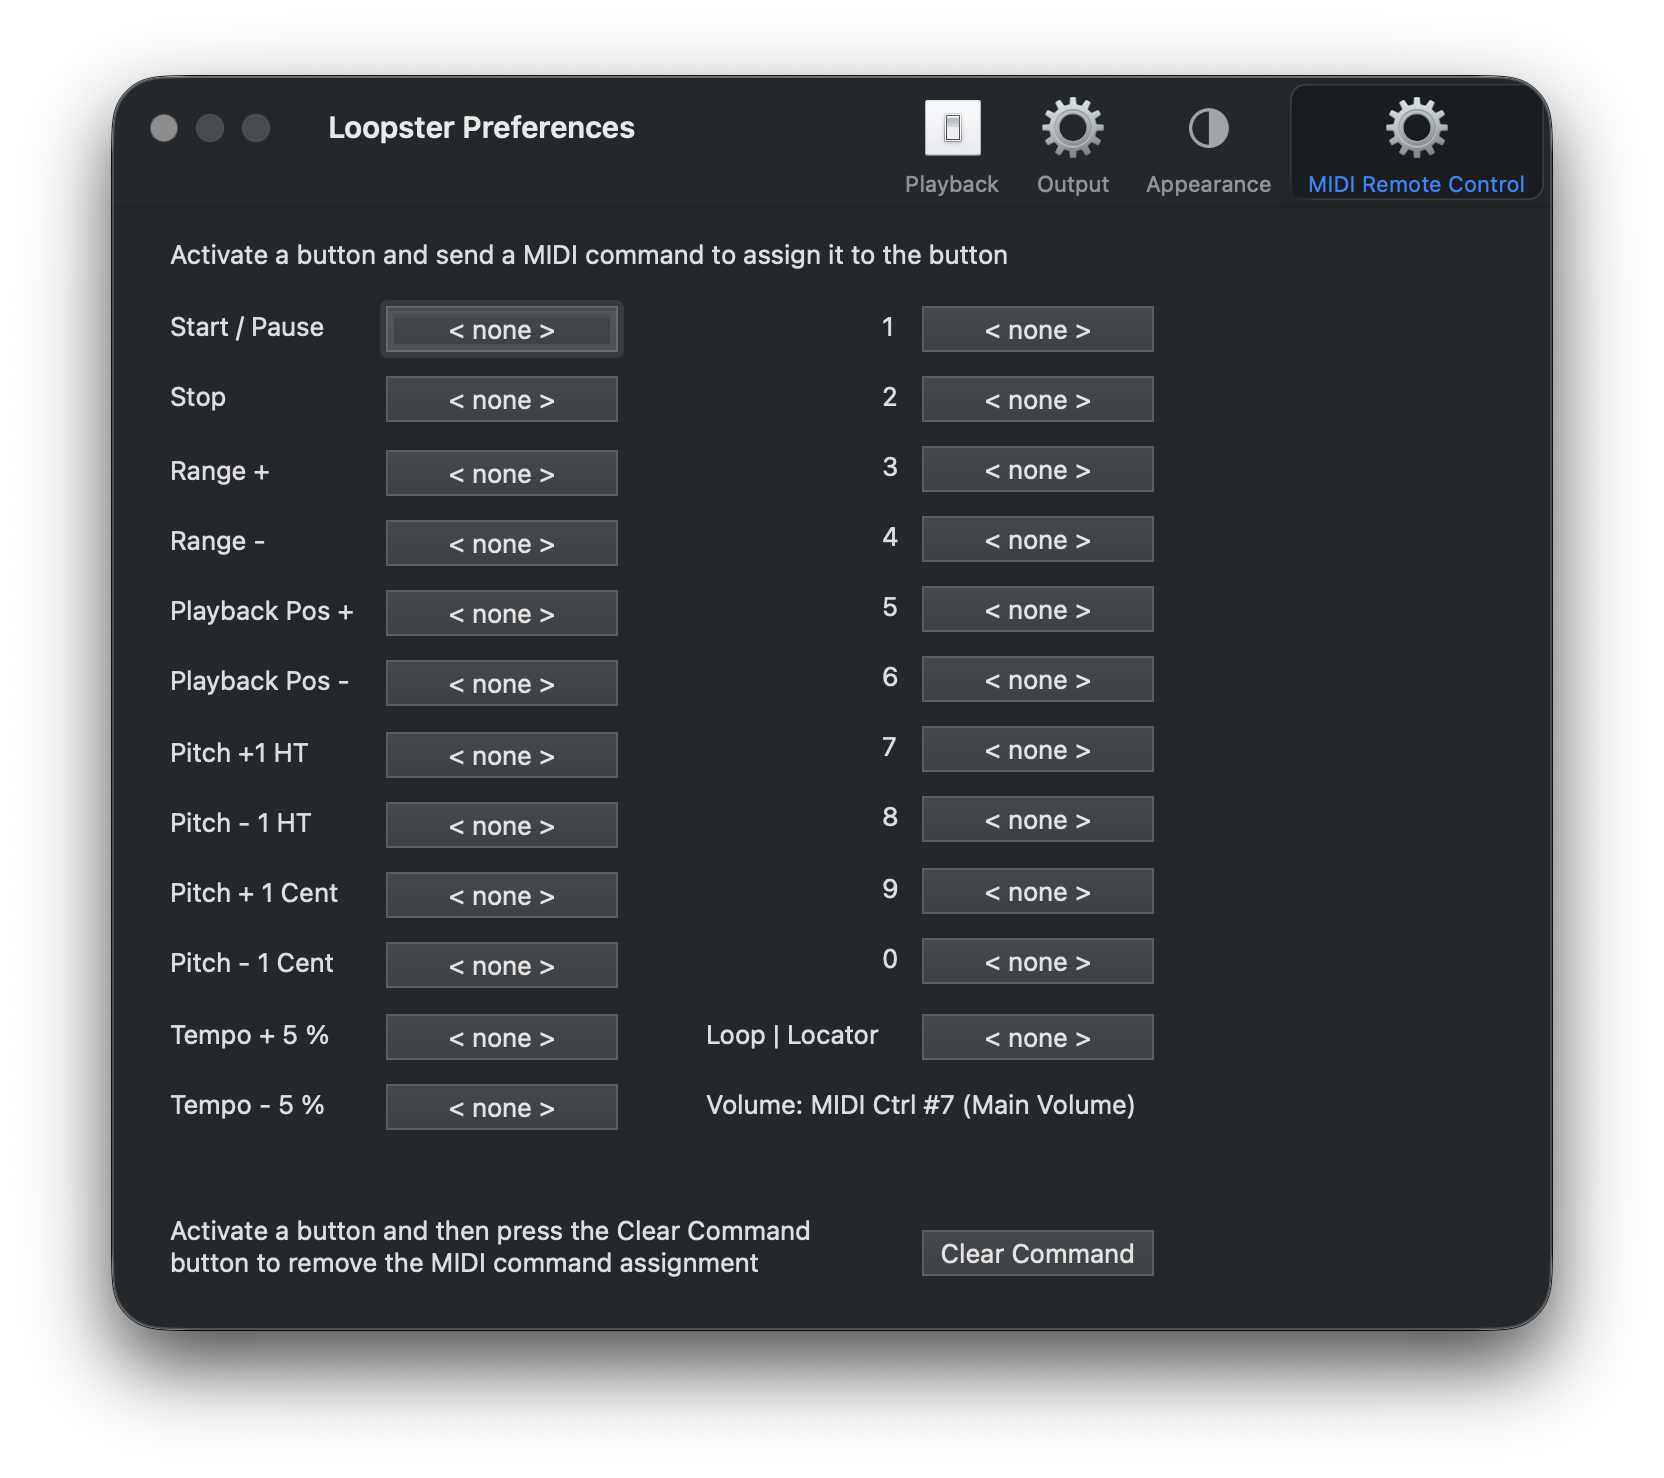
MIDI Remote Control
Loopster automatically detects every MIDI device connected to your Mac. It accepts Note On and Program Change messages on all MIDI channels.
Volume is fixed to MIDI controller #7 (the standard) — Loopster always responds to volume changes from a connected device, and this is the one assignment you can't change.
To assign a MIDI command to a Loopster function, click the corresponding button in this pane and send the MIDI message you want to use. Loopster will display the captured command on the button.
To remove a MIDI assignment, click the button and then press Clear Command.
If Loopster stops responding to MIDI, unplug and replug your MIDI device (USB) — Loopster will redetect everything that's connected.